Three bases give the week a workable shape
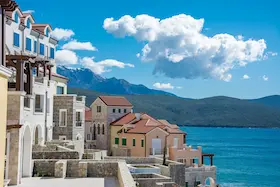
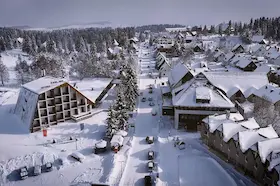
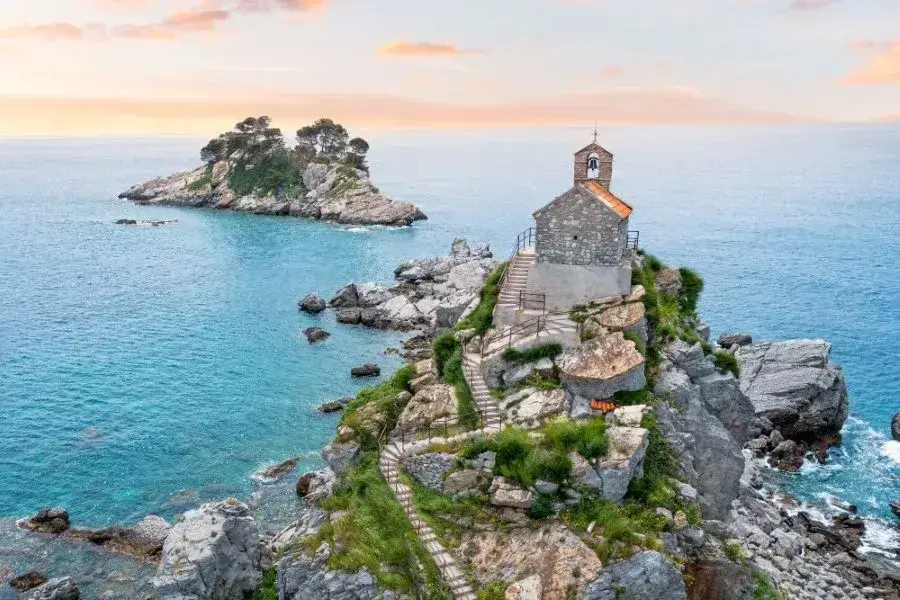
The first two nights remain in Petrovac for the town itself and the Budva coast. Kotor then becomes the base for the arrival through Cetinje, Lovćen and Njeguši and for a separate day covering Kotor and Perast. Two nights in Žabljak distinguish the long transfer through Ostrog from the full Durmitor day. This arrangement limits luggage moves to two and gives each base a clear task. Day seven returns through the Tara Valley and Kolašin without adding another overnight location.
How the seven days fit together
Petrovac, Lučice and Buljarica fill day one. Sveti Stefan, Miločer and Budva share day two. The third day crosses Cetinje, Lovćen and Njeguši to Kotor, and the fourth stays within the bay for Kotor, Perast and Our Lady of the Rocks. Ostrog breaks the journey to Žabljak on day five. Black Lake and the complete Durmitor Ring occupy day six, before Đurđevića Tara Bridge and Kolašin lead back to Petrovac on day seven.
The seven-day itinerary
Start with Petrovac and the Budva coast, cross Cetinje and Lovćen to reach Kotor Bay, then travel through Ostrog to Durmitor. Đurđevića Tara and Kolašin form the final stages back to Petrovac.
Day 1Petrovac, Lučice and BuljaricaKeep the opening day in and around Petrovac before committing to the longer journeys. The promenade and Kastio are explored on foot, Lučice fills the middle of the day and only the final leg to Buljarica requires the car.6-7 hours | Sleep in Petrovac
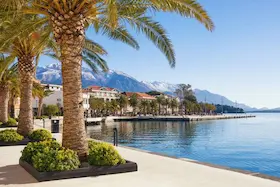
Leave the car at “Autobuska Petrovac” and begin on the seafront promenade. Kastio fortress occupies the rock at the western end of the town beach, with open views towards Katič, Sveta Nedjelja and the full curve of the bay. After the terrace, wander through the streets immediately behind the waterfront to see how closely the town fits around the shore. Return to the same car park before setting off for Lučice.
Lučice lies close enough to reach on foot, although driving is useful if you plan to continue to Buljarica. A wooded headland separates this sheltered cove from Petrovac’s town beach, making it suitable for a swim, lunch and a longer shaded pause. Drivers can use the car park beside the main approach and walk the remaining distance. Collect the car afterwards and continue south for a few minutes.
Use the marked car park at the main entrance to Buljarica and explore the nearby stretch of beach. Unlike the compact coves around Petrovac, this shore runs past open fields beneath the Paštrovići slopes. Spend time where the beach, undeveloped land and long coastal line are visible together rather than trying to cover its full length. Drive back to Petrovac for dinner and a final walk along the promenade.
Day 2Sveti Stefan, Miločer and BudvaDay two follows one coastal direction from Petrovac. Begin at the publicly accessible side of Sveti Stefan, continue on foot from Pržno through Miločer Park and reserve the afternoon for the walled centre of Budva.7-8 hours | Sleep in Petrovac
The drive from Petrovac takes roughly 20 minutes. Search for “Parking Sveti Stefan”, leave the car there and descend on foot to the public access beside the peninsula. From this level you can study the stone settlement, its narrow causeway and the beaches on either side rather than seeing it only from the road above. Walk back to the car and continue to Pržno.
Use the map name “Parking lot, Pržno” and start beside the small harbour. The coastal path threads through Miločer Park past stone houses, mature cypresses, King’s Beach and Queen’s Beach, with changing views back towards Sveti Stefan. Turn round after the palace park section and retrace the path to Pržno. From the car park, continue directly to Budva.
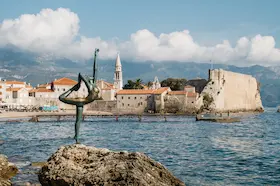
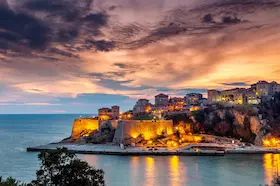
Choose Jat or Zetafilm car park before walking through a gate into Budva Old Town. Visit the Citadel and the churches of Saint John and Holy Trinity, then leave by the gate near Pizana for the path to the Ballerina statue. The small squares and lanes work best as one historic quarter rather than a checklist of photographs. Allow three to four hours including lunch, then return to Petrovac for the second night.
Day 3Cetinje, Lovćen and Njeguši to KotorLeave Petrovac for Cetinje, cross Lovćen and pause in Njeguši before descending to Kotor. This move joins the former royal capital with the mountain and reaches the bay in time for the first of two nights there.8-10 hours | Sleep in Kotor
The journey from Petrovac to Cetinje takes about an hour. Park within walking distance of the historic centre, pass Cetinje Monastery and Biljarda, and continue to the Museum of King Nikola. Its furnished rooms, portraits, arms, decorations and personal possessions give a direct account of Montenegro’s final royal dynasty. Afterwards, follow Njegoševa Street back through the centre before driving uphill towards Lovćen.
From Cetinje, travel through Ivanova Korita to the parking area below Jezerski Vrh. The long stairway reaches the Njegoš Mausoleum, while the stone path beyond it leads to an exposed viewpoint across Lovćen and towards Kotor Bay. Give the ascent, interior and return at least two hours. The monument honours Petar II Petrović Njegoš and the final terrace places his memorial within the mountain landscape.
Continue downhill to Njeguši and use a marked space near the middle of the village. Njegoš’s birthplace preserves the stone house and courtyard associated with his early life, giving the stop more substance than a meal alone. Afterwards, try the smoked ham and cheese for which Njeguši is known. The old switchback road to Kotor begins after this village pause.
The descent from Njeguši reveals Kotor Bay in stages, with Kotor, Dobrota and the Vrmac peninsula appearing from different heights. Stop only at the established viewpoints, then continue to Benovo car park on arrival in Kotor. Check into the same accommodation for two nights. A gentle evening circuit of the principal Old Town squares is enough because the full visit follows next morning.
Day 4Kotor, Perast and Our Lady of the RocksRemain at the same Kotor base for a complete day around the bay. Explore the Old Town during the morning, reach Perast after lunch and cross to Our Lady of the Rocks before returning for the night.7-9 hours | Sleep in Kotor
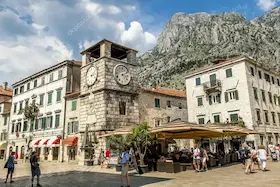
Walk through the Sea Gate into the Square of Arms, then continue to Saint Tryphon’s Cathedral, Saint Luke’s Square, Saint Mary’s Church and the smaller passages between them. From the upper side of the Old Town, follow the marked trail to the Church of Our Lady of Health for a view over the tiled roofs and bay. Descend by the same route. Keep the car at Benovo until the Kotor visit is finished.
Perast is around 25 minutes from Kotor. Use a marked car park at the entrance, as the waterfront itself is best covered on foot. The single shoreline street passes baroque stone palaces, Saint Nicholas Church and small squares facing the Verige Strait. Walk the town before choosing a boat, then return to the pier for the crossing to Our Lady of the Rocks.
The boat journey from Perast to Our Lady of the Rocks is short. Within the church, look for the votive collection and the paintings of Tripo Kokolja, then step outside for views of Perast, the island of Saint George and both shores of the bay. Confirm the return journey with the same operator before boarding. Once back in Perast, collect the car and spend the second night in Kotor.
Day 5Kotor to Žabljak through OstrogUse Ostrog as the main visit on the transfer from Kotor Bay to northern Montenegro. Set off from Kotor in the morning and, after the monastery, travel by Nikšić and Šavnik to the first night in Žabljak.7-8 hours | Sleep in Žabljak
Leave Kotor after breakfast and travel by Risan, Grahovo and Nikšić towards Ostrog. The Upper Monastery becomes visible in the cliff above the Bjelopavlići Plain before the final ascent. Use a last pause to arrange a small bag with water, documents and anything required during the visit. Keep the remaining luggage locked out of sight in the car and wear clothing appropriate for a religious site.
Two small cave churches, connecting passages and terraces form the Upper Ostrog Monastery within an almost vertical rock face. Enter quietly, wait for other visitors and follow the terraces overlooking the Bjelopavlići Plain. The setting and compact interior justify at least an hour and a half rather than a hurried photograph. Take in the final view across the plain before returning to the car.
Retrace the approach towards Nikšić, then continue through Šavnik to Žabljak. The scenery changes steadily from the karst and plains of central Montenegro to high pasture beneath the Durmitor peaks. On arrival, settle into the same Žabljak accommodation for two nights and take a short walk around the centre. Black Lake and the full mountain circuit are reserved for the following day.
Day 6Black Lake and the Durmitor RingGive the sixth day entirely to Durmitor. Walk to Black Lake first, then complete the mountain circuit by Mala Crna Gora, Sušica Canyon, Trsa and Sedlo Pass.8-10 hours | Sleep in Žabljak
Drive the short distance from central Žabljak to the approach for Black Lake. Use the car park by Hotel Soa, continue past the entrance on foot and follow the forest path to the water. Both the Small and Large sections can be seen beneath Mount Međed from the lakeside route. After the walk, return to the car and head for Bosača to begin the Durmitor Ring.
The first part of the circuit climbs through Bosača to Mala Crna Gora, where stone houses and summer pasture sit below Durmitor’s high peaks. Beyond the village, the road drops towards Nedajno and brings Sušica Canyon into view on the western side of the massif. Pause for roughly half an hour to take in the depth of the canyon. Continue from there to Trsa.
Make Trsa the main rest point of the mountain circuit. Its open plateau setting faces the Durmitor massif, and lunch here divides the demanding western section from the climb back through Sedlo. A short walk among the houses and pasture gives a sense of how the village occupies this exposed landscape. Afterwards, continue by Pišče towards the highest part of the route.
Sedlo Pass brings the final sequence of sharp peaks and broad upland meadows. Leave the car at the pass long enough to look towards Sedlena Greda and into the centre of the Durmitor massif. The descent from Sedlo returns directly to Žabljak, closing the ring without repeating the morning road through Mala Crna Gora. With a second night already arranged, there is no need to move luggage after the full day.
Day 7Đurđevića Tara and Kolašin to PetrovacClose the circuit by travelling from Žabljak back to the coast. Đurđevića Tara Bridge begins the day, Kolašin provides the final long pause and Petrovac is the clear endpoint.7-9 hours | Return to Petrovac
Đurđevića Tara Bridge is about half an hour from Žabljak. Leave the car in a marked space by the approach and walk towards the middle, where the five arches and the depth of the canyon can be understood together. Look upstream and downstream before returning to the car. The onward road then follows the Tara Valley towards Mojkovac and Kolašin.
Continue beside the Tara to Mojkovac and on to Kolašin. Park near the centre and walk around Trg boraca and the short surrounding streets before lunch. A restaurant serving kačamak, local layered cheese or another northern Montenegrin dish makes this the final substantial pause of the circuit. Rest properly, then set off through Podgorica for Petrovac.
From Kolašin, continue through Podgorica and towards the coast. Park at your accommodation when you reach Petrovac and end the trip with an evening walk beside the sea. The final arrival closes the seven-day loop at the same base where it started, after Budva, Kotor Bay, Ostrog and Durmitor.
Before booking, compare the hire price, deposit terms, luggage space and exact collection location.
Four choices that protect the seven-day plan
Confirm the three accommodation bases, save the relevant car parks and prepare the following day’s essentials before each transfer.
Nights one and two stay in Petrovac. Use Kotor for the third and fourth nights, and Žabljak for the fifth and sixth. Travel back to Petrovac on day seven.
Use Jat or Zetafilm for Budva, Benovo for Kotor and the marked entrance car park for Perast. Continue through each historic centre on foot from those points.
Take water, documents and the essentials with you. Leave the remaining luggage locked and out of sight in the car during the Upper Monastery visit.
Before day six, confirm with the National Park Visitor Centre that the complete Durmitor Ring is open, then refuel in Žabljak. Use Trsa for the longest break before Sedlo.
Tara and Kolašin lead back to Petrovac
Begin the final day at Đurđevića Tara Bridge and walk far enough onto it to see the five arches and canyon together. Continue beside the Tara through Mojkovac to Kolašin for a walk around Trg boraca and a proper lunch. The last drive runs through Podgorica to Petrovac. Reaching the original Petrovac accommodation completes the circuit, followed by an evening beside the sea.
Travellers who will enjoy this plan
This itinerary is intended for travellers who want the coast, historic towns, a major monastery and a mountain national park within one week. It suits couples, families with older children and small groups comfortable with three longer driving days. Petrovac, Budva, Cetinje, Kotor, Perast, Ostrog and Durmitor each have a substantial place in the itinerary instead of a brief photo stop. Three stable bases keep the week practical without making it feel repetitive.